 |
|
Session 10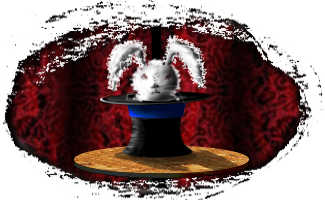 |
for the Web "Da Fuzz Buster!" (Part 2 of Session 9) Page 1 / Page 2 |
|
Supplies for this Session: Nothing but good ol' Photoshop needed for this one folks. |
|
| Preface Greetings people of the world! This Session is the last one in this series. In this Session we'll be covering how to fix "the fuzzies" that we ended up with in the Gif file we saw in Session 9. When we ended, we had made a transparent area within our gif image, but had that ever so lovely (not!) fuzzy edge around the cirlce part of our image. This Session will deal with how to get rid of that, as well as what i consider to be a "cleaner" way to create transparent gifs, that can be put against any kind of background you wish. Let's get started shall we? ALSO: if you feel the need to print this material out you have my permission. But please do not redistribute it. |
|
What's a rabbit to do?... Anyone using PS 4/5 will have this filter. It comes as a standard feature and is located under the Filter Menu, within the Export submenu. People using Photoshop 3 can get this as a plugin from any of the many plugin sites on the web. And it's free too by-the-way.  Ok so let's have another look at the image we finished with at the end of Session 9. Take a look at it here. Notice the fuzzy border around the circlular part? That's what we want to get rid of in this Session. Ok so let's have another look at the image we finished with at the end of Session 9. Take a look at it here. Notice the fuzzy border around the circlular part? That's what we want to get rid of in this Session. |
| 1) | "Like a bad-hair day!" |
| Let's move on now to exporting our image and creating the transparent area. ((( Turn to Page 2 ))) |
| "The Photoshop Guru's Handbook" ™ and all contents of this site are copyright 96/00 Mark Anthony Larmand - (aka theKeeper) all rights reserved. |