 |
Session 2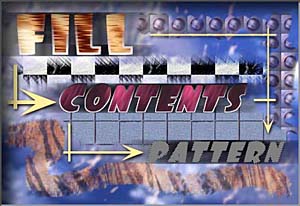 |
Clipping Groups & Texture Painting "Fill / Contents / Pattern" |
| Supplies for this Session: Any of your favorite texture patterns will do here. Or if you prefer you can use a photograph. |
|
| Clipping Groups | The
Pattern Fill | Drawing Textures | Fading Textures | Random Textures | Texture Cloning | The Edge |
| Preface "Fill/Contents/Pattern"... I believe that says it all right there, doesn't it? In this month's Session we're going to find out how to increase our productivity with some time saving ways to work with texture Patterns. We'll also discover some easy ways to apply our favorite texture Patterns to everything from buttons for the web to that pseudo-Piccasso we've all been working on for the last year and a half of our lives! ALSO: if you feel the need to print this material out you have my express permission. But please do not redistribute it. Thanx Much. With all that said, I hope you enjoy this session! |
| The beginning of a beautiful friendship... Open a New document to practice in. The size should be big enough so you don't have to keep erasing or undoing all the time. Give yourself a canvas with a bit of room on it. I usually make mine 400x250 / RGB / White as background. |
||
1) |
Learning how to create "Clipping Groups": Create a new layer. Using Black as your foreground colour, create a simple shape by making a square or circle with the selection tools and filling it with black, or use a special "picture brush" if you have one. After you've made your shape create another new layer. What we're going to do now is "clip" the layer that has the black shape on it to the layer just above it in the layers palette. Position the very tip of your mouse hand over top of the black line that separates the two layers. Now while holding down the Alt/Option key click your mouse on the line. Notice that while you're holding the Alt/Option key down the mouse turns into what looks like (& is) a big pin-tac. That symbolizes the joining of the two layers.You should now see a *dotted* line between the two layers instead of a solid one. As well as a dotted line separating the two layers, you should now see a solid line under the name of the lower layer. That line means that this layer is the 'base' layer of the group and contains the pixels that will create a mask on the layer(s) that are 'clipped' above it. That means that whatever you paint on the lower of these two layers will act like an invisible mask on the layer or layers above it. This is known as, or called, a "Clipping Group" by Adobe. Remember that. The reason I say "layers" is because you can join more than two layers together. In fact you can clip together as many as your heart desires. [ until you run out of memory from having so many layers ;) ] |
| 2) | Applying the "Pattern Fill" function:
If you want to 'unclip' them just repeat the same steps you performed to clip them together- hold down the Alt key (Mac:Option) and click on the dotted line. |
| 3) | Drawing textures: Activate Layer 1, the bottom layer, by clicking on it. Now pic a medium sized round brush with a soft (fuzzy) edge to it. I think 35 is a good size. Don't worry about the foreground colour, it doesn't matter. Begin to draw something, anything. Do you see how the texture pattern only appears where ever you draw pixels? Photoshop is applying the texture pattern or picture that you defined instead of a colour. Here's another way to look at it: imagine that the bottom layer is a solid piece of paper that is covering the layer above it. When you apply colour to the bottom layer with a brush you are cutting holes in the paper (which is the bottom layer) that let the texture pattern on the above layer show through. Feel free to play around with this for a minute. When you're ready to go on, click on Layer 1, select all and delete what you've done on it. Then hit Ctrl+D to deselect. (Mac:Command+D) |
| 4) | Fading textures: Pick your gradient tool. Open the Styles pop-up menu on the options palette for that tool and choose 'Foreground to Transparent' (Double-click the tool to open it's Options palette). Photoshop 4 users will have to hit the EDIT button on their gradient options palette and choose the same setting from the pop-up list. Photoshop 5+ users will choose the 'Foreground to Transparent' style, and click the 'Reverse' checkbox on the bottom right side of the option palette. It doesn't matter what foreground colour you use (I used black). Set the gradient Type to Linear.  Also turn off the Background layer by clicking on it's eye, so you can see the effect more clearly. Also turn off the Background layer by clicking on it's eye, so you can see the effect more clearly.Now start at the top of your canvas and click and drag the tool to the bottom, and then let go. Notice how the texture pattern or picture fades in from the top to the bottom of the canvas. You should be able to see Photoshop's checkered transparency grid at the very top gradually fade away as the image fades in stronger at the bottom. The amount of fade that you get on the Defined Pattern will depend on where you start and stop the application of the gradient tool. Now select all for Layer 1 and delete the contents again. Then deselect. Then turn on the Background layer again by re-clicking on it's eye. |
| 5) | Random textured effects: Grab a medium sized, hard-edged round brush, and on the canvas of Layer 1 draw an X and put a dot in each open area (in between the stems) of that X. Don't go too close to the edge of the canvas with the X. Now go up to the Filter menu and go down to Distort / Ripple. Apply the filter with a setting of 500 or so and use the Large setting. Our X is now a pattern of squiggley scribbles. With the texture pattern on the top layer showing through the black area on layer 1.  Just for the heck-of-it, Duplicate layer 1. You'll notice that the new 'Layer 1 copy' becomes the Base Mask layer. Now activate 'Layer 1' by clicking on it; it should be below the 'Layer 1 copy' layer now. Just for the heck-of-it, Duplicate layer 1. You'll notice that the new 'Layer 1 copy' becomes the Base Mask layer. Now activate 'Layer 1' by clicking on it; it should be below the 'Layer 1 copy' layer now.Now use the MOVE tool and your arrow keys to nudge the layer up & left 5 or 6 pixels. Now apply a Guassian Blur of 3 to 4 pixels. I used 3.5. Your picture should look something like fluffy white cloth torn open to reveal the hidden texture pattern or picture below. Right? Look at mine to get an idea of what I mean. This in itself can be an interesting, if not unusual, effect. This also shows us just one simple method that you can use to Experiment! with the filters in Photoshop to get a better understanding of what they are all capable of doing for you. And you'll also strengthen your creative processes at the same time. |
| 6) | Painting Clones of a 'Defined Pattern': or..."Send In the Clones!" {;^D... boooooo... booooooo...sorry 'bout that. Now we will see a different way of applying a 'Defined' texture pattern to our works. First-off grab the blurred shadow layer (Layer 1) on the bottom of your layers palette and chuck it in the trash can. It's the one that you moved up & left. We're done with it. Now turn off the eye for the 2nd layer; the one with your texture pattern or picture in it. Activate 'Layer 1 copy' by clicking on it. Double-click this layer and remove the word 'copy' from the name; so it's named 'Layer 1' again. This isn't important, it's just for clarity sake in explaining things. Once again select ALL and delete the contents of Layer 1. Pick the CLONING tool. Photoshop 4 users: In the Options palette for the Cloning tool open the pop-up menu and set the option to PATTERN - aligned. Photoshop 5+ users: Press and hold your mouse down on the Clone tool in the Tools palette. Then choose the second Clone tool in the mini slide out palette. This is the 'Pattern Clone' tool. In the Options palette for the tool click the checkbox beside the word 'Aligned'. Now, anything you paint on the canvas will produce the Texture Pattern or picture that you defined in the beginning of the Session. Go ahead and try it. Just draw around on the canvas. You can still change your brushes and use whatever sizes you'd like. It's just that instead of painting with color, you're painting with the texture pattern you 'Defined'. One useful way to apply this function of the tool is to use the same layer to paint several images or shapes on, but re-Define a new Pattern each time you draw something else. That's what I did for parts of the title graphic at the top of the page. Some of the different texture patterns you see in the picture were done on one layer using this function of the Cloning tool. |
| Step over The Edge! (Experiments) Here are just a few other ways that you can use the information we just covered: (Ill leave it up to you to find more)
If not, then just consider this a brushing-up of old techniques. ;^) Until next time... Onward'n'Upward! theKeeper |
| "The Photoshop Guru's Handbook" ™ and all contents of this site are copyright 96/00 Mark Anthony Larmand - (aka theKeeper) all rights reserved. |