Information about this Trick:
This
technique can be used in Photoshop 4 |
|

Start
a new file. File | new...
Choose a suitable size and
make sure you are in RGB mode.
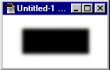
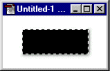
Start a new layer and draw a rectangle, use black color.
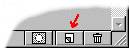
Duplicate the layer. Layer | Duplicate Layer... (or
right-click on the layer and Duplicate Layer)
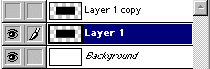
Make Layer 1 active by clicking on it. And turn the
upper layer off by clicking on the eyeball icon. This is how
it should look now. |
 |
|

Apply
2,5 pixels Gaussian Blur.
Filter | Blur | Gaussian
Blur...
And now go to Filter | Stylize |
Emboss...
Use these settings: Angle: 135, Height: 6,
Amout: 100 %.
|
 |
|

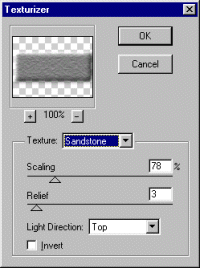
Add
a texture:
Filter | Texture | Texturizer...
I
have a propasol for settings, look at the picture.
(Ofcaurse it is not necessary to add a texture)
|
|
|

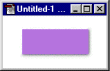
Make
the upper layer active by clicking on it. And be sure the the
eyeball is there too. And now...
Select | Load
Selection... | OK
Choose a new color as Foreground color and hit
alt + delete to fill the selection with it or use the
Paint Bucket Tool.
Select | Deselect |
|
|

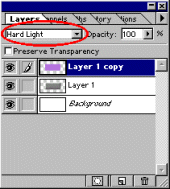
Now
we want the Layer 1 emboss effects to shine through the
color in the top layer.
Simply do this:
Go to the drop
down box in the layers palette and change layer mode to hard
light.
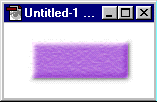
Now we are done and isn't it nice ?
|
|